

A 3D-printed scale model of your project starts life as a real model: the Revit or BIM model your team already has, or one I build in Revit from your drawings and photos at real dimensions. That one fact is the whole differentiator: what ends up on your desk is a scaled, physical version of the actual design, not a generic tower shape that happens to be roughly the right size. Here’s the real process, screen to shelf — how a project file on a laptop becomes something you can hand across a table.
I’ve spent 10+ years in construction and VDC, about four of them on-site, working inside these models for coordination and sequencing long before I ever sent one to a printer. That’s not incidental to the 3D-printed architectural model service — it’s why I can take a model built for clash detection and prep it for print without losing what makes it accurate. It’s also why this model is usually the third piece of a bigger picture, not a standalone request — I write more about how coordination, sequencing, and printing share one file in VDC services vs. BIM coordination.
Where it starts: the model already on the job
The print doesn’t begin with a photo of a rendering or a simplified massing file — it begins with the same Revit or BIM model already doing real work on the project. If I’m already running your BIM coordination or building your 4D construction animation, I already have it; there’s no new file hand-off, no separate scope to manage. If a model doesn’t exist yet, send me what you do have — drawings, an early design model, whatever’s been built so far — and I’ll tell you what’s possible.
That starting point matters more than it sounds like it should. Everything downstream — the accuracy of the columns, the proportions of the tower, the shape of the core — inherits directly from the model, not from anyone’s interpretation of it.
Step 1 — Prepping the model to print
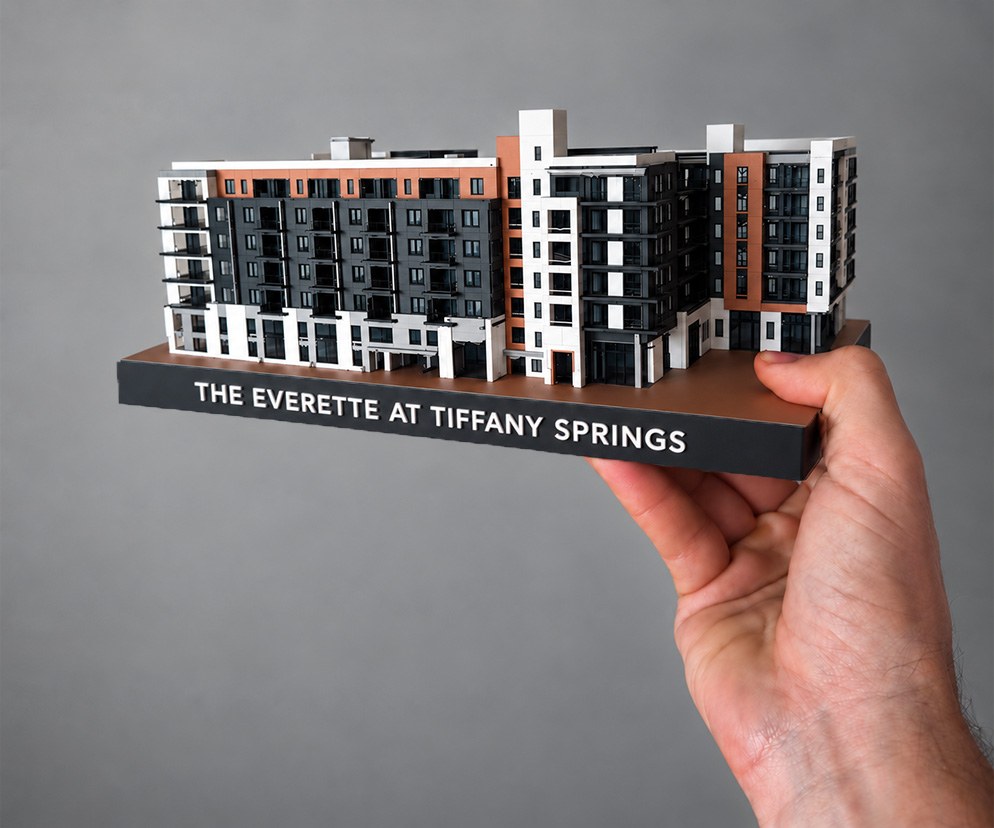
A coordination-grade model carries far more than a printer needs: MEP routing, rebar, glazing material, finishes that read as texture on a screen but mean nothing at a few inches of scale. On mid-rise buildings, prep keeps real facade detail alongside the structure — balconies, window openings, the columns, decks, and core — the building the way a builder actually sees it, not the way a photograph would show it. On true high-rises, where floor plates compress at that scale, prep still pares back to structure alone. Windows print in straight from the Revit model, as open cutouts or dark panels, and at model scale they read as windows. For a see-through look, the Full Color + Acrylic Windows finish adds tinted acrylic panels behind the facade.
Once the geometry is cleaned up, slicing software takes over. It breaks the model into the hundreds of thin horizontal layers the printer will build up one at a time, and it works out where temporary support material needs to go so overhangs — and a crane’s boom, if you’re including one — don’t collapse mid-print.
Step 2 — Printing, layer by layer
Everything prints in-house, in the US, on a professional desktop printer — not farmed out to an overseas shop or a print-on-demand service. The printer deposits melted PLA filament layer by layer, building the geometry from the base up exactly the way the sliced file lays it out.
Time depends on the size and complexity of the building — a larger, multi-pass model can run up to about two days of print time, while a smaller single-piece model moves faster. The printer runs unattended once it’s dialed in, but it’s still one job on one machine at a time — part of why a full set for an entire project team takes longer than a single model. Color is set in the filament itself, not painted on after the fact — up to five colors, so the model can carry your building’s real material palette instead of one flat tone.
Step 3 — Assembly and finish
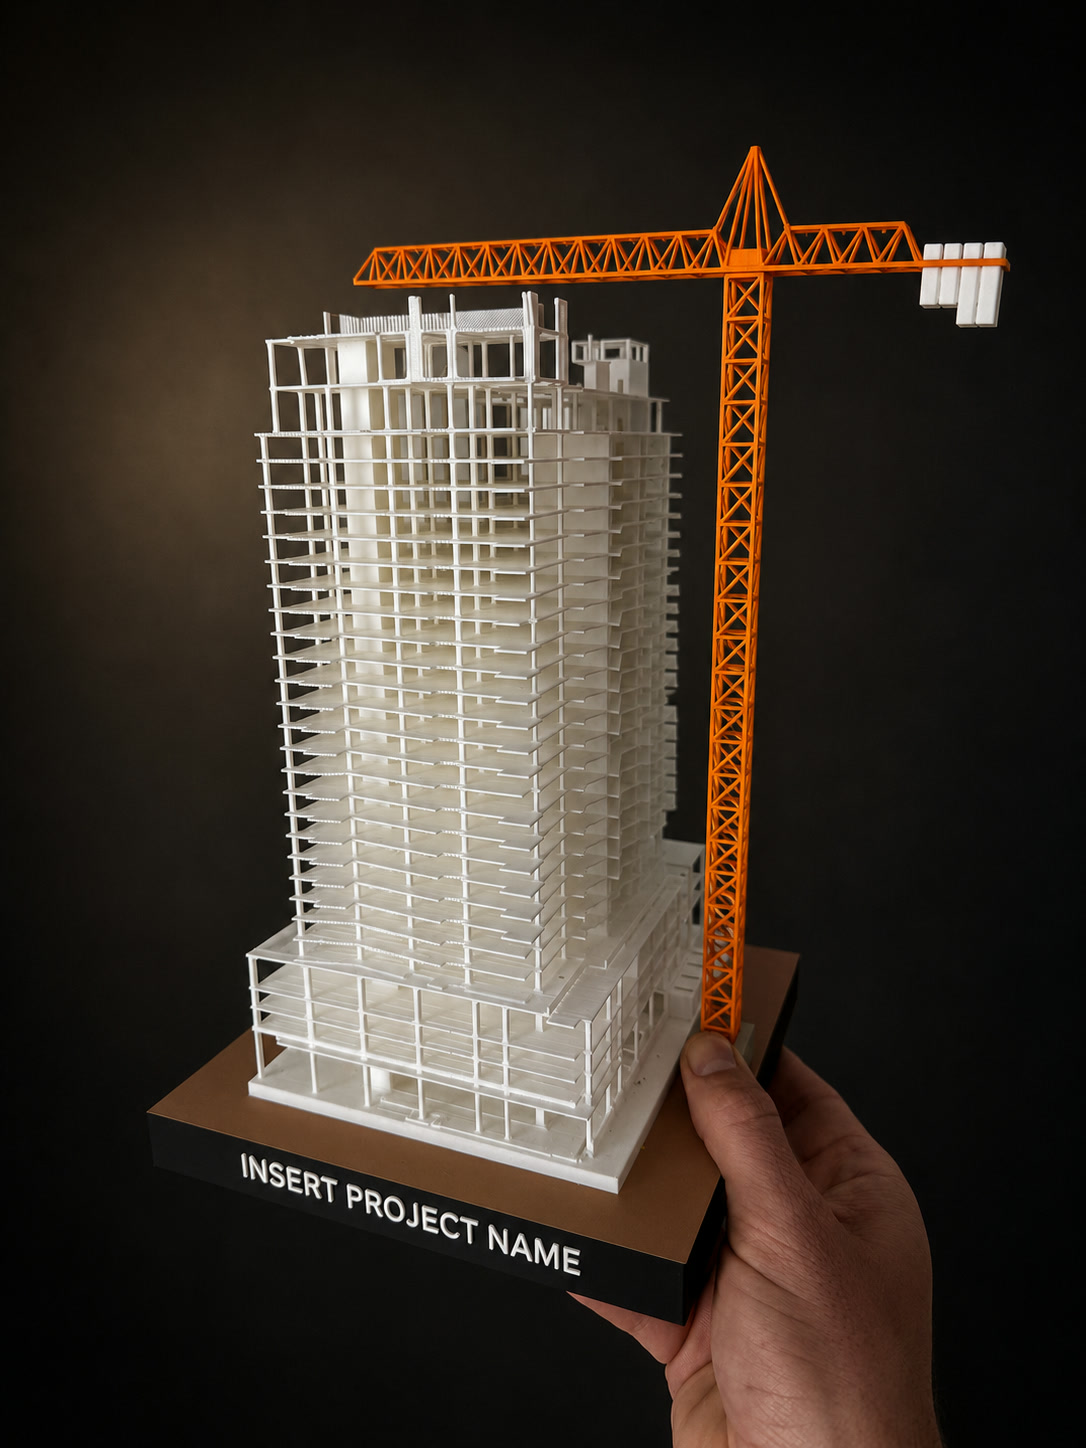
Once printing finishes, support material comes off and edges get cleaned up. Anything printed in separate pieces — a taller building split into printable sections, or a removable tower crane — gets fitted together here.
This is also where personalization comes in: a project name, a team member’s name and title, a company logo, a milestone date. It’s built into the process rather than bolted on afterward, which is what turns a printed building into an actual custom construction scale model for this specific job and this specific team, not a stock shape with a nameplate glued on. Tell me what you want included and I’ll fold it into your estimate.
Step 4 — Delivery
Turnaround runs 2–6 weeks depending on quantity and workload. A single model moves faster than a full set — a groundbreaking gift for one owner is a different job than a topping-out set for an entire project team, since every unit is still an individual print, not a mold pulled off a production line.
Why printing from the real model beats a generic model-shop build
Many physical model builders start from a photo, a floor plan, or a simplified massing file and rebuild the shape by hand or by eye, with no real model in between. The result looks like the building without necessarily being the building — every rebuild is another chance for a column line, a proportion, or a roofline to drift from what’s actually being built. A lot of what’s sold as a 3D-printed architectural model is exactly this: a smoothed-over shape, roughly to scale, built to look right from a few feet away.
A generic model looks like the building. A model printed from the real design data is the building, just smaller.
Printing from the same Revit or BIM model that’s already coordinating the job — or driving the 4D sequence — skips that translation step entirely. The file that goes to the printer is the file the trades are building to. What lands on the table is dimensionally the real design: a 3D-printed construction model built from the same data as the job itself, not a separate creative interpretation of it. If there’s no model yet, I build one in Revit from your drawings and photos at real dimensions, then print from that, the same way a floor plan and a few photos become a 3D-printed house model. The difference from a shop that shapes the building by eye is the real model in the middle, not who supplied it.
What teams actually do with them
Pursuit and interview leave-behinds. Handed to the selection committee at the close of an interview, the model stays on a desk or a boardroom shelf long after the deck closes and the room clears. If you’re already building a 4D construction animation for the same pursuit, the model is the physical half of the same story — the committee watches the plan, then keeps a piece of it.
Topping-out and client gifts. A groundbreaking, a topping-out, a project closeout — moments worth marking with something the owner actually keeps, not another folder in a drawer. I cover which model fits which milestone in groundbreaking ceremony gifts.
Team recognition. A model for the crew that built it, personalized with names and titles, marking the job as theirs.
Frequently asked questions
Do you need my full Revit model, or is a simpler file enough?
The full coordination-grade model is ideal, and if I'm already running your BIM coordination or building your 4D animation, I already have it. If a full model doesn't exist yet, send me whatever you do have and I'll tell you what's possible.
Do you print every detail of the building?
On mid-rise buildings, yes — real facade detail like balconies and window openings prints right alongside the structure. On true high-rises, where floor plates compress at that scale, prep pares the model down to structure: columns, decks, and core. Either way, it reads as the building a builder actually sees, not a smoothed-over shape.
Can the crane come off?
Yes — the tower crane is a removable option, so the model displays with or without it.
How long does the whole thing take, start to finish?
It depends on the size of the model and current workload — plan on 2–6 weeks. That covers ordering filament in specific colors when a project needs them, plus print time; larger multi-pass models take longer to print than smaller single-piece ones. That's before assembly, finish work, and any personalization go on.